Clinical metadata and file upload
Creating a Clinical Metadata Template for BRCA Pre-Cancer Research
- Uploading Clinical Metadata
- Uploading Data Files
This guide provides step-by-step instructions on how to import clinical metadata for the Gray Foundation portal. It explains how to navigate to the Data Curator App, select the project, complete a patient cohort data template, validate the metadata, and submit it. Following this guide will help users efficiently import clinical metadata for the Gray Foundation portal.
1. Navigate to the Data Curator App
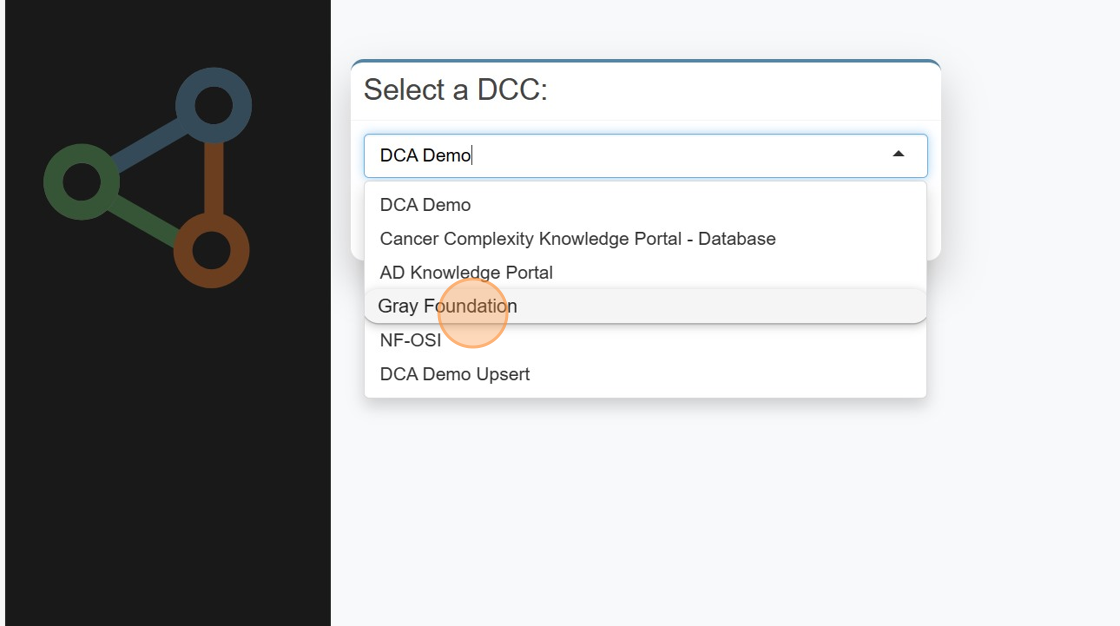
2. Select "Gray Foundation"

3. Select your project

4. Click the "Patient Cohort Data" folder

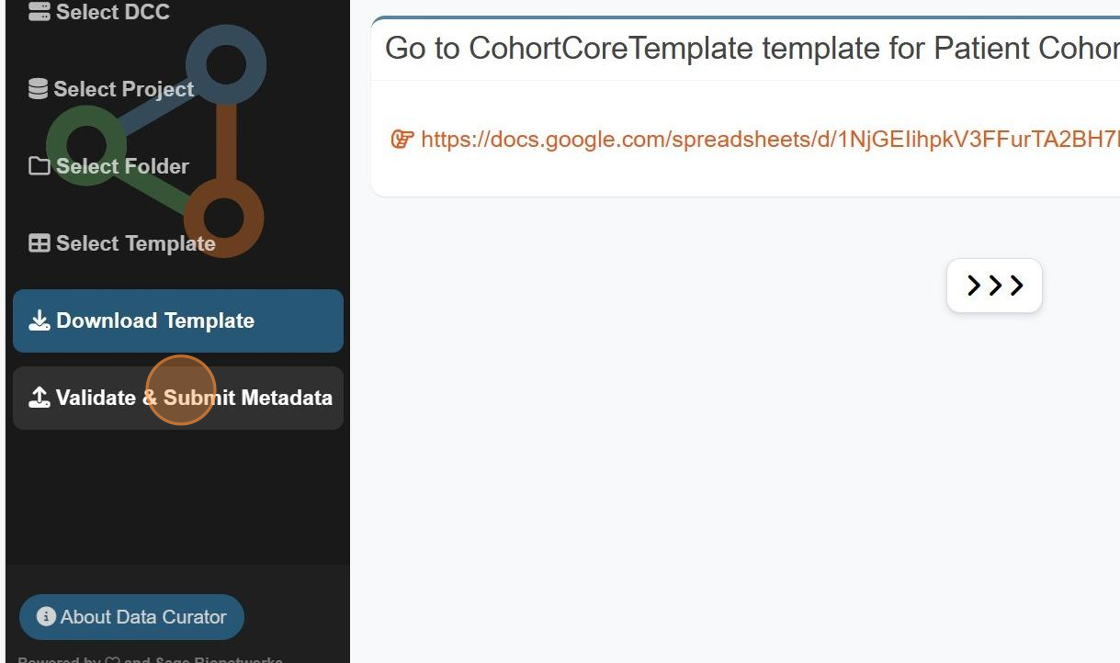
5. Click Patient Cohort Data Template and "Download template"

6. Click the link to the google sheet

7. Complete the google sheet with your patient cohort data

8. Ensure all columns required are complete

9. Download as a .csv file

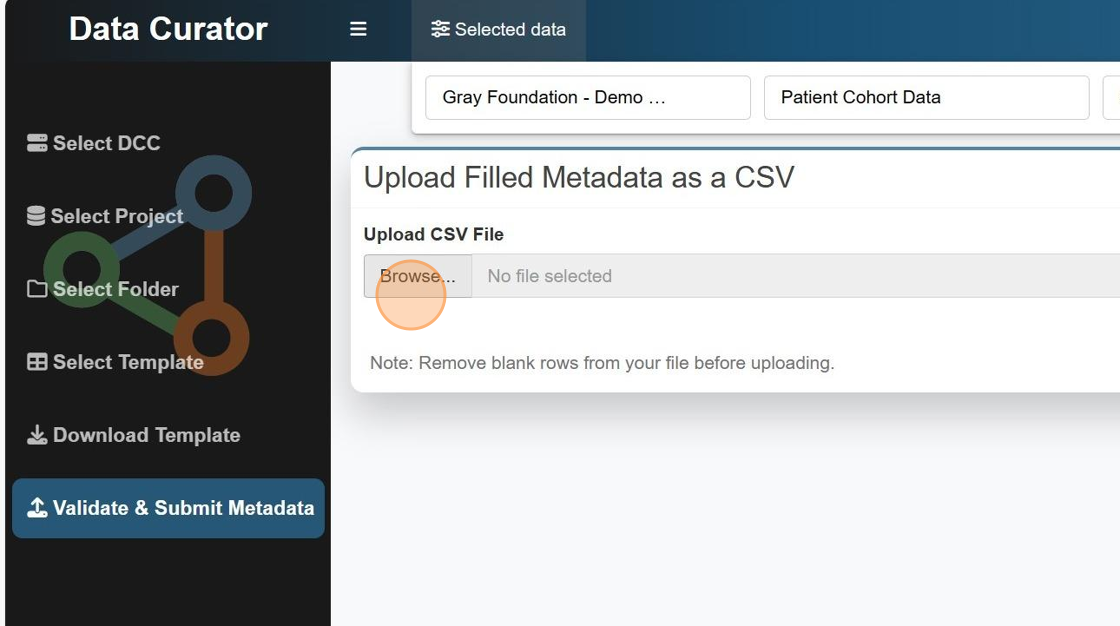
10. Click "Validate & Submit Metadata"

11. Click here

12. Click "Validate Metadata"

Made with Scribe
Before you begin, identify the destination for your data. Most data are organized in pre-assigned folders based on assay and data levels. You can create subfolders for additional organization, especially for batch-specific data.
Data Organization
Data is organized by its assay type and, logically, its processed type in folders. Each top-level folder and all of its subfolders must contain data of the same type (see details below).
The DCC will create empty, common top-level folders as well as subfolders for the expected levels of data. This depends on whether both raw or processed data are expected. Sometimes only raw data or only processed data is expected. If only one level of data is expected, everything is "collapsed" into only one folder and there are no subfolders. Subfolders must be of the same data type and level as the root folder they are contained.
└── single_cell_RNA_seq
    ├── single_cell_RNA_seq_level1
        ├── fileA.fastq
        ├── fileB.fastq
        ├── fileC.fastq
        └── fileD.fastq
    ├── single_cell_RNA_seq_level2
        ├── fileA.bam
        ├── fileB.bam
        ├── fileC.bam
        └── fileD.bam
    ├── single_cell_RNA_seq_level3
        ├── raw_counts.txt
        ├── normalized_counts.txt
    ├── single_cell_RNA_seq_level4
        ├── t-SNE.txt
By understanding the data generation process, the Data Coordination Center (DCC) can effectively collaborate with each team to address the following questions:
- What are the different types of data that will be generated, and how can the data artifacts from this workflow be optimally handled and managed?
- Are there any recommendations that can be provided to ensure a smooth workflow and avoid potential issues in the downstream analysis?
- What additional resources can the DCC offer, if available?
Depending on your funded aims, project teams may have specialized data workflows, which can include:
- Generating sequencing data and deriving data using multiple variant calling pipelines.
- Producing high-resolution images and extracting summary features from images.
- Combining different types of data.
During the onboarding process, it is essential to discuss the anticipated workflow, especially if it is complex or deviates from the standard. Project teams should provide information or documentation regarding their workflow.
In addition to the project team's data processing, the DCC also performs data processing on the uploaded data in Synapse. This processing includes:
- Quality control assessments.
- File format conversions.
- Other necessary data transformations to facilitate data loading and sharing in cBioPortal or other analysis applications.
Synapse User Interface (UI)
The UI is suitable for smaller files less than 100MB. In the designated folder, access the Folder Tools menu for upload options. Refer to the general UI documentation for details.
Programmatic clients
For larger and numerous files, use programmatic clients for efficient uploading. Options include the command-line tool, Python script, or R. Find detailed documentation for each option. Reach out to the DCC for assistance.
Typical Workflow with Python Command-Line Client
-
Install Python Package: Install the Synapse Python package from PyPI. This will also automatically install the command line utility. Test out that the command line utility is working by typing
synapse helpand feel free to review docs for the Python CLI client. -
Create Access Token: For large uploads, it is best to create an access token. Go to your Account profile > Account Settings > Personal Access Tokens > Create new token.
-
Create Configuration File: For convenience, copy and paste the token into a
.synapseConfigtext file:[authentication]
authtoken = sometokenstringxxxxxxxxxxxxxxxxxx -
Create Manifest File: Create a list of files to transfer (called a manifest). The parent-id is the Synapse folder you are trying to upload files to:
synapse manifest --parent-id syn12345678 --manifest-file manifest.txt PATH_TO_DIR_WITH_FILES -
Certified User Check: If you are not a Certified User, the tool will output a message. Review and complete the Certified User portion of Account Setup before proceeding.
-
Execute Sync Command: Successful execution should create a manifest file
manifest.txt. Ensure that.synapseConfigis present locally to provide authentication:synapse sync manifest.txtOptions for retries in case of a poor connection:
synapse sync --retries 3 manifest.txt
One-off Uploads
For just a few files, a more convenient command might be:
synapse store my_image.tiff --parentId syn12345678
Alternative Methods
Under rare unique circumstances, the DCC can explore the following options:
- Receiving data via physical hard drive
- Utilizing Globus transfers (if really needed)
- Transferring from a custom S3 bucket
Feel free to adjust or customize it according to your needs!